Love handicrafts? Shop small scale, use Etsy!

Showing posts with label how to. Show all posts

Monday, October 15, 2012

Crash Course: Making Bread Pt 2

So it's been an hour or so, let's check on the dough...

Hmm, it's looking pretty good, but I want to have a more tender crumb and a more developed flavor. I'll check back in another hour.

Now if you like what your dough is doing in with an hour rise, then by all means, use it. There is absolutely nothing wrong with the dough and it will be WONDERFUL!

My house is a bit on the cool side. I let it rise for about 3 hours total. This is what looks like:
-------------------------------------------------------------------------------------------------------
Punch that dough DOOOOOOWN!
See how it stays indented? Perfect!
Knead it a little to get the large air bubbles out.
Now it's time to shape it. Here I'm a bit more gentle with the kneading, but at the same time i'm rolling the ends under. This is merely cosmetic as I shape the loaf.
It's log, log. It's big. It's heavy. It's... BREAD! From this point, you could cut it into equal sized pieces and make roll shapes and put it on a cookie sheet, or keep the rustic shape and put it on the pan. You of course can make any shape you want, and mark the top. I put it in a loaf pan.
From here, let it proof til it doubles in size once again.

Preheat your oven to 375 degrees Fahrenheit...

Because it's close to Samhain/Halloween, I marked it with a pentagram using the tip of a sharp knife. As the bread rises and puffs it will be quite lovely.

Then into the oven it goes for 45 minutes. I use the same time when making rolls from the dough.

Update @ 7:38 PM 10/15/2012: It's almost done. I never get tired of the scent of baking bread, never. Mmmmmmmmmmm. That reminds me, I need to go to the health food store to get local organic pastured (Not Pasteurized) raw cream to make butter for this delicious bread. And yes, I'll show you how to make that too!
Time to get out the cooling racks if you have em. If not a clean dish towel will work just fine.
Take the loaf out. The top should be slightly brown. It should be hard and with almost a hollow thud sound.

Cool it in the pan until it comes out on its own, otherwise it can break apart. The proteins in the wheat flour need to set up a bit.

Once it can come out on its own, cool it the rest of the way on a cooling rack or on the dish towel.

This loaf slices very well, with a nice crunchy crust. It goes nicely with a soup or stew to sop up the broth.

It also freezes and refrigerates excellently. I keep it in the fridge so it lasts longer. It slices better when chilled.

I slice it for sandwiches, toast and use the ends of the bread to make croutons or bread crumbs if I don't eat them first!

It is crusty, crunchy and a lovely chewy texture.

I hope you enjoy this basic bread crash course as much I enjoyed putting it together. And once you get this down, you can experiment with flavors, flours, bread types. The possibilities are endless.

If you have any questions, ask away. I'll be happy to help you.

*I am not a chef professional or otherwise. I'm a home cook, a survivalist and a homesteader. I've been making bread by hand since i was a child at my grandmother's knee. This is what she taught me. This is by no means the only method or recipe.*

Crash Course: Making Bread Pt 1

In this first of a continual series of crash courses, I'll be showing you how to make a basic loaf of bread. Nothing fancy or complex. This is just to get your feet wet. There will be a lot of pictures, and easy instruction. If you want something more complicated or creative, we'll do that in a different entry.

Why make your own bread:

Making your own bread is a great release of stress, especially when you're kneading it. You can get out so much frustration. Regardless of the emotional benefits (lol) you'll be learning how to make something useful, nutritious and delicious.

Regular commercial breads are full of excess salt, sugar, preservatives and yes folks, many times, high fructose corn syrup. Why does bread need HFCS? That's beyond me. When you feed your family, you'll feel good about it's simplistic wholesomeness, and enjoy it.

In another crash course, we'll discuss making your own sourdough starter by 2 simple ingredients and how to capture the wild yeasts floating around in the world.

About this Bread:

This is a basic white bread for slicing/tearing loaves, or rolls, or anything you need a simple bread for. There are a lot of bread recipes out there. You can find any flavor you'd like on the net. But, when shit hits the fan you're going to want to know how to make flour into something edible and nutritious. If you've made bread before, wonderful! If not, this is the crash course for you!

Ingredients:

1 pkg instant dry yeast
1 tsp. sugar (any natural sweetner is good. It is used to feed the yeast. DO NOT USE ARTIFICIAL CHEMICAL SWEETNERS!)
1 C. Warm Water @ 100 - 110 degrees Fahrenheit (More for Kneading)
2 Tbsp. oil (Any liquid cooking oil will work just fine)
1 Tbsp Salt (This is optional, but without it the bread will be very bland)
3 C. A/P Flour (More for kneading)

How To:

I like to clean as I go, so I make a sink of hot soapy water to drop in my utensils until I'm able to wash them.

In a large bowl, add 1 package of yeast.

To the yeast add 1 cup of warm water between 100 and 110 degrees Fahrenheit. You may need more water for kneading if it's too dry, so put some in a cup to have on hand.

  • Too cool - yeast will be slow to bloom if at all
  • Too warm - yeast will die
Add 1 tsp of sugar. Yeast eats sugar. The yeasts have been dormant and probably kept in the refrigerator (or at least it should be), so they're hungry. This will give them a good head start, so they'll burp and make the carbon dioxide gas that lets the bread rise and gives it its yeasty flavor. You won't taste the sugar.

Let the yeast nom on the sugar for about 10-15 minutes. The longer you let it chill the more developed the flavor will be. As long as the yeast stays at room temperature, you can keep this going for a while. The yeast will be foamy and fragrant. I start drooling at this point. Mmm so good!

Now, we'll start building the rest of the dough. Add 1 Tbsp of salt. Feel free to add more or less depending on how you like it. I do add some, because it can be terribly bland otherwise.

Add 3 Cups of flour. You may need more for as you knead if it's too sticky to keep some out in a dish to have on hand.


I start mixing it with a wooden spoon, until it tightens up, and starts forming a mass.

Add 1 tablespoon of oil. I add the oil after I have stirred a little well in the flour. This adds a little more moisture and helps with the sticky factor. You'll knead less, require less water/flour adjustments, resulting in a more tender texture.


It's BREAD HAAAAANNNND! No, but really. Once it starts looking like this from stirring, it's time to get your hands in there. Start working it in the bowl some, and let it come together a little more.

It's still going to be floury and flaky at this point. Turn it out onto your counter, or other kneading surface. Make sure that it is clean and dry before you start. Now knead my lil' breadsticks, KNEAD!!

Weather, and moisture content of ingredients can differ from batch to batch. But don't panic! This is easy to fix.

IF IT'S TOO DRY: Knead for a couple of minutes. If it is still too dry and not coming together any more and is just crumbling apart, you can add a little more water at this point. Only add 1 tablespoon at a time, and knead for a little bit before you add any more. It takes a few minutes for the flour to absorb the water. It will be a bit sticky to your hands while you knead it, but don't add more flour just yet. You'll see it will come together more and more. 

IF IT'S TOO WET: If it's too wet still, and sticks to the counter and your hands, sprinkle some flour on the counter, your hands and the dough. Knead it in. Keep repeating this until it is no longer sticky. Do this a little at a time. No more than a tablespoon or two. Let the flour absorb the moisture and combine itself.

Keep adjusting little by little and you'll get it. I promise. Bread making is very much a "feel" thing. Trust your instincts and take your time!

You can see from these pictures that the rough looking dough becomes smoother and smoother. It will also become more elastic as the gluten forms strings. This is what gives bread its texture, the gluten proteins. The more you work it the more chewy your bread will be.

Work your dough until it becomes smooth and consistent.


In a new clean bowl, or the same bowl you used to make the dough, add another tablespoon of oil. 


Coat the bowl and and dough ball with the oil. This will help it from forming a skin which would give you a tougher crust, and keep it from sticking to the bowl, too much as it rises.

Now cover the bowl with a clean dish cloth and keep in a warm place where it won't be bothered for no less than 1 hour. The longer it rises the more developed the flavor will become

.In Part 2: Punching down, 2nd rise, shaping, baking, finished product!

Sunday, October 7, 2012

So you want to build a solar oven. Pt 1

So you want to build a solar oven? Good Luck!

There are kits you can buy, or you can buy more heavy duty materials to make it last longer. Well I'm broke as balls; you know "welfare budget" and all, so I wanted to figure out how to do it with found objects, things I had around the house, and minimal purchase, but from things only found at the local dollar store. Information about the benefits and blah dee blah of solar ovens will come in a different post.

Pictures will come as I make it happen, and so I'll write this sort of like a diary...

Day 1: 10/7/2012

Dear Diary,
   Today I want to build a solar oven. I've seen examples and web pages and want to see about building one of my own.

I have a lot of cardboard boxes around here, let's see what i can come up with.

I made from parts of 1 box, a 15" x 15" with 6" sides. I taped it with duct tape, just to hold it together, so i could have my hands free.

The great thing with this is that I can always build the sides up by gluing and taping more cardboard. Perfection and beauty not required.

I want to essentially paper mache the cardboard to make it more durable. So I made home made Mod Podge like this:

1 Pint Mason Jar
1 Bottle All-Purpose White Glue (Like Elmer's, but a generic brand will be just fine. It needs to be non-toxic. This type of glue does not release under heat.)

Into the jar, I poured the bottle of glue, which a typical bottle will be just a little less than half of the jar. I filled the rest with water, put on the lid, shook, a voila; home made mod podge for a fraction of the price. I think I paid 37 cents for mine from the clearance shelf at Walmart.

I used brown paper shopping & lunch bags, because that's what I have at the moment, and pasted on a layer on the box and I'm letting that dry tonight.

I also am using a cooling rack with a piece of cardboard cut to the size of the top, duct taped it in place, and have the bottom pasted with brown paper too. I'm letting that dry tonight as well. That will be the base of the "cooking" part of the oven, where I'll be pasting aluminum foil.

The Outside box is larger than the inside box. I'll be crumpling newspapers to put in between the two. The air between them as well as the newspaper will insulate allowing the cooker to be more efficient with less heat loss.

That's all I've done for tonight. I'll check back tomorrow.

*Disclaimer* There are fantastic free plans, and kits out there available over the internet. This is not the ONLY right method. This is an experiment. If it works, great. If it doesn't, well, we'll try something else.

Sunday, July 29, 2012

YouTube Channel Review: RickVanMan

I don't do this often, but I'm thinking I might. There are so many brilliant people on YT that it may require a thought...

RickVanMan's channel on YouTube (http://www.youtube.com/user/rickvanman) This guy is awesome. I really like his style. He's easy to understand, easy to follow and VERY informative.

His channel is varietal, however he focuses on a lot of the homesteading things that we do. He has instructional and informative videos ranging from herbalism, how to make tinctures, and creams and other useful things with your herbs, foraging, and even gardening. He has many other things on there too. I find him very entertaining and chock full of information. He also answers questions in his comments sections, and is very knowledgeable!

Here is just one his videos about How to Make a Cream.. This is part of a series about herbalism basics.

Do you have other YT channels you enjoy and would like me to check out? Put it in the comments section!

Thursday, May 31, 2012

Replace It: Laundry Detergent: Powder

As with the shampoo we discussed earlier, laundry detergents have the same problem; a whole mess of chemicals that aren't good for us, or our planet. It's so crazy easy, you can make great big batches for a fraction of what a box or a bottle costs. It is just as effective. You're less likely to have an allergic reaction, and you can either scent it or leave it plain.


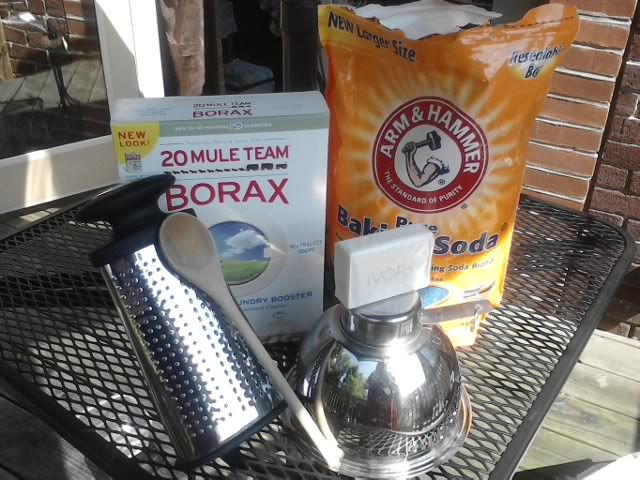
What you'll need:

  • 1 bar of plain Ivory or Castile soap (Don't get all fancy with this, moisturizes and scents won't help you wash your clothes. Plain old basic soap is all you need)
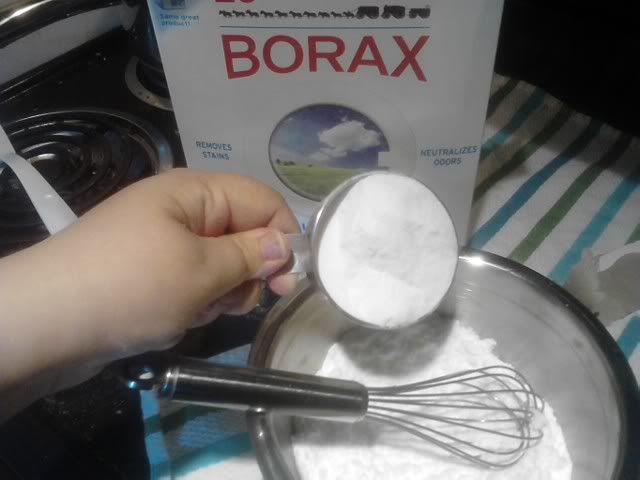
  • 1 Cup of Borax
  • 1 Cup of Baking Soda
  • Optional: 1 Tbsp finely ground herbs or 10 - 12 drops of essential oils (experiment with amounts in this. It's for fragrance. a little goes a long way, but make it the way you're happy with it.)
  • A container large enough to hold it
  • A cheese grater
  • A whisk or spoon
Instructions: (WITH PICTURES!!!)


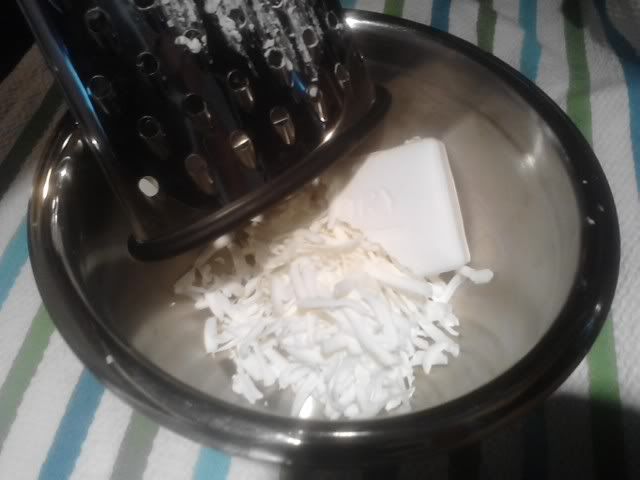
1. Grate the soap.
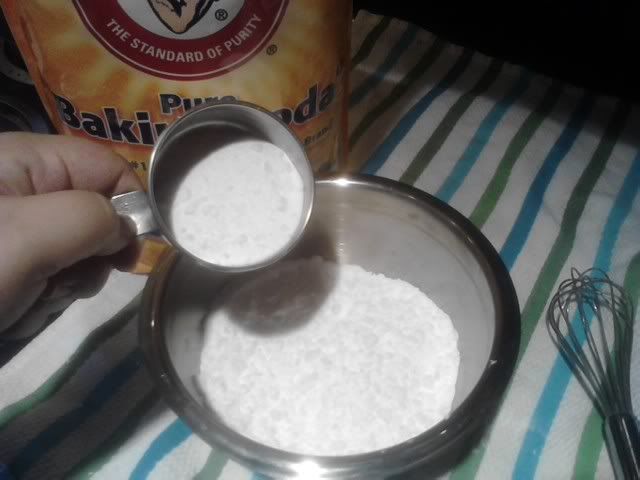
2. Add Baking Soda
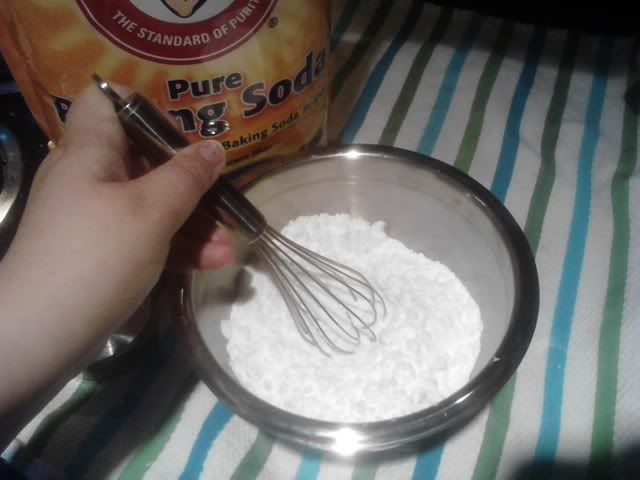
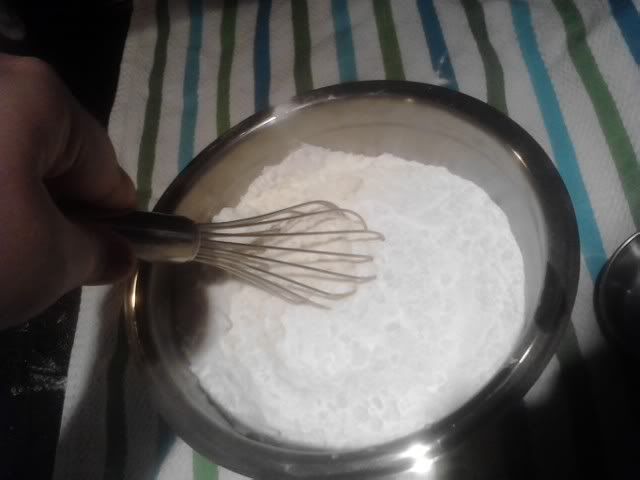
3. Stir
4. Add Borax
5. Stir
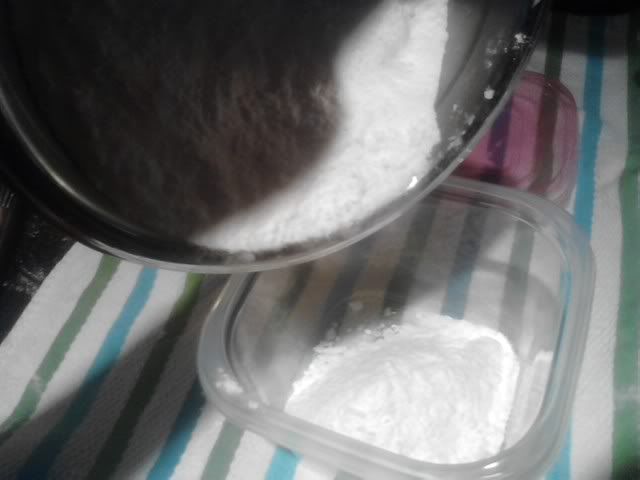
6. Add to storage container.
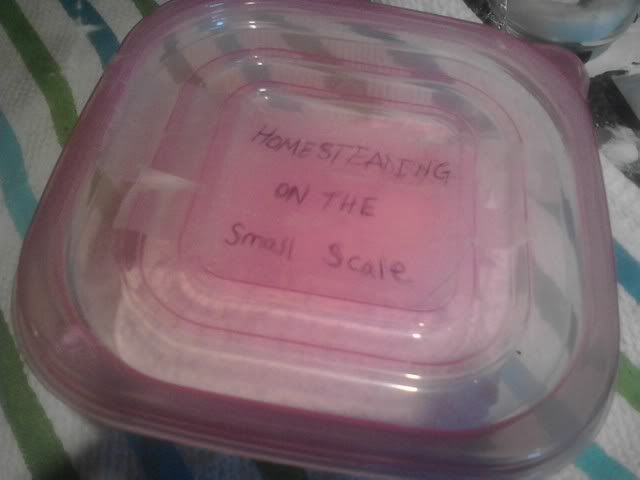
7. Seal and Label!

Use:
 1-2 Tbsp per regular load. Use more or less depending on how soiled your clothes are and the size of the load. 

It will make approximately 32 -64 loads depending on  the amount you use, but it's so inexpensive, you can easily make more when you want it!

Oh, you wanted liquid detergent? No problem...


Have you tried this? Know other laundry soap recipes? Tell us about it!! 

Tuesday, May 15, 2012

How To: Make your own Kefir!

*NOTE: I will be adding photos to this post during my next batch, so it won't always be empty.*

These instructions are what I follow. I got them from the farm I buy my raw milk from. There are other instructions to be found on the net. They are all very similar to this. What I like about the instructions from "The Family Cow" farm is that it is very 1, 2, 3 -- very step by step which is how I like it. It's a list. I LOVE LISTS!

What you will need:

  • Jar or Crock (We prefer a stoneware crock)
  • Real Kefir Grains
  • Raw Milk (Preferably from Certified Organic Jersey! :) )
  • Cloth or towel
  • Colander or strainer (holes should be about 1/16th in diameter)
  • Bowl
  • Wooden spoon or spatula
To start the process:
  1. Place the entire contents of "Kefir Starter Grains" into the crock or jar.
  2. Pour 1 quart of milk over grains. (Keep down 1" or so from rim as milk will expand)
  3. Cover with a cloth or towel to keep flies/dirt out but still let oxygen in.
  4. Let sit at room temperature for 24 hours to culture. Do not set in sunlight.
  5. Stir cultured Kefir to break up the thickness to make it easier to strain. Do not be alarmed at the curdled look of the kefir. Curds are a perfectly normal part of cheese, yogurt, and kefir making.
  6. Set the colander on top of the bowl and pour the kefir into it. Use the spoon to help the kefir through. Do not rinse the grains after you strain them. In fact, it would be better to leave a few curds with them.
  7. Return the grains to the fermentation crock to be ready for the next batch. After several batches, you'll notice that you have more grains than you started with. When you have 1 cup or more, you may start culturing 1/2 a gallon at a time... or, find a friend who wants some kefir grains. *NOTE: I WILL LET YOU KNOW WHEN I HAVE SOME READY FOR THOSE THAT WANT THEM, AS THEY BECOME AVAILABLE*
  8. Place the freshly strained Kefir in the refrigerator to chill.
  9. Puree your choice of fruit (frozen is best) in a food processor or blender. Then add the chilled kefir along with sugar, maple syrup. (I PREFER HONEY) or other sweetener to suit your taste. It is totally up to you to decide how sweet you like it or what flavors to add. We enjoy banana, peach, strawberry, blueberry, nectarine, orange, apricot or even a blend of several. Your imagination is the limit.
Kefir Smoothie - Honey, Banana and Strawberry. I used the food processor.
(Mothers, try freezing cool pops with Kefir instead of kool-aid. Your children will love them!... or freeze a pan of kefir and then process the frozen Kefir with frozen fruit, and a little extra sugar. (It tastes almost exactly like sherbet.)

To start the next batch: Place the grains in the fermentation jar, refill it with milk and repeat the whole process.

To take a short break from kefir making: Place the grains in a small container, cover with milk, cover container with a paper towel or cloth secured by a rubber band, and refrigerate. The cold temperatures will only allow a very slow fermentation. Important: Change the milk every week so the probiotic bacteria do not starve. The first batch or so will take longer than 24 hours to ferment til the grains get revived from their dormancy.

To take a long break: Rinse the grains with water and lay them on a paper towel to dry. When they are totally dry, place the grains in a container and store in your kitchen cupboard. They have been known to keep up to 2 or 3 years like this. When you are ready to start again, simply place the grains in milk like you would for a normal batch of kefir. The first batch will take longer than 24 hours to ferment til the grains get fully re-hydrated and revived.


If you use an antibacterial soap or something like Clorox to wash the container (WHICH IS NOT A GOOD IDEA) you are using for fermenting, be VERY careful to rinse it well as any residuals will KILL the grains. it is actually NOT necessary to wash your fermentation jar every time. The little bit of kefir left on the inside will help start the next batch.

Happy Kefir Making!

Interesting Study: Google "Health/Kefir"

Friday, May 4, 2012

How To: Shampoo

Have you ever looked at the back of your own shampoo bottle and wondered about that never ending list of ingredients? What are those things? Ok, water. I know what water is. Let's see what is on the back of one of the ones I used to use. I keep it around to remind me of how icky that stuff is...


Pantene Classic Shampoo:


Let us go one by one on this list and figure out what this crap is. I like knowing what it is that I'm using.


  • Water: H2O, basic, required for every day life. This is O.K. Stuff!
  • Sodium Laureth Sulfate: Man-made chemical used as a surfactant: Toxic or harmful to non-reproductive organs, and irritating to the skin, and eyes.
  • Sodium Lauryl Sulfate: Man-Made chemical used as a surfactant, foaming, Emulsifying, and denaturant.: Toxic to non-reproductive organs, can be irritating for eyes and skin, environmental toxin.
  • Glycol Distearate a compound based on stearic acid, a naturally occurring fatty acid. ::  Opacifying Agent; Skin-Conditioning Agent - Occlusive; Viscosity Increasing Agent -Nonaqueous; EMOLLIENT; EMULSIFYING; SKIN CONDITIONING; VISCOSITY CONTROLLING
  • Dimethicone  a silicon-based polymer used as a lubricant and conditioning agent. ::  Antifoaming Agent; Skin-Conditioning Agent - Occlusive; Skin Protectant; EMOLLIENT; SKIN CONDITIONING; SKIN PROTECTING :: Toxic or harmful to non-reproductive organs.
  • Cocoamidopropyl Betaine ::  Cocamidopropyl betaine is a synthetic surfactant; it has been associated with irritation and allergic contact dermatitis, reactions that could be due to the ingredient itself or to impurities present in it, such as 3-dimethylaminopropylamine. ::  Antistatic Agent; Hair Conditioning Agent; Skin-Conditioning Agent - Miscellaneous;Surfactant - Cleansing Agent; Surfactant - Foam Booster; Viscosity Increasing Agent - Aqueous; FOAM BOOSTING; VISCOSITY CONTROLLING :: Immune System Intoxicant, Environmental Toxin, 
  • Sodium Citrate ::  Cosmetic manufacturers use sodium citrate to adjust the acidity of a product. Citrate, in the form of citric acid, is also found in citric fruits and juices. ::  pH Adjuster; BUFFERING; CHELATING; MASKING
  • Cocamide Mea ::  Cocamide MEA is a compound synthesized from coconut oils and ethanolamine. ::  Surfactant - Foam Booster; Viscosity Increasing Agent - Aqueous; EMULSIFYING; EMULSION STABILISING; FOAM BOOSTING; VISCOSITY CONTROLLING
  • Sodium Xylenesulfonate ::  Sodium Xylenesulfonate is a sodium salt of ring sulfonated mixed xylene isomers. ::  Surfactant - Hydrotrope
  • Fragrance (Could the be more vague?) ::  The word fragrance or parfum on the product label represents an undisclosed mixture of various scent chemicals and ingredients used as fragrance dispersants such as diethyl phthalate. Fragrance mixes have been associated with allergies, dermatitis, respiratory distress and potential effects on the reproductive system.
  • Citric Acid :: This is Vitamin C ::  Citric acid is an alpha hydroxy acid used in personal care products to adjust the acidity or promote skin peeling and re-growth in the case of anti-aging products. Citric acid is naturally found in citric fruits and juices, providing the characteristic acidic taste.
  • Sodium Benzoate ::  Sodium benzoate is a preservative commonly used in foods, pharmaceuticals and cosmetics. :: Limited evidence of sense organ toxicity
  • Guar Hydroxypropyltrimonium Chloride ::  Guar Hydroxypropyltrimonium Chloride is a quaternary ammonium derivative of guar gum; used in hair conditioning products. ::  Classified as medium human health priority for non-reproductive organ toxicity.
  • Sodium Chloride : It's Salt
  • Tetrasodium Edta ::  a chelating agent, used to sequester and decrease the reactivity of metal ions that may be present in a product. :: Non-reproductive organ toxicity - Classified as expected to be toxic or harmful &  Limited evidence of eye toxicity
  • PanthenolPanthenol is a form of vitamin B5, used as a moisturizer and lubricating compound. This ingredient is listed in the PETA's Caring Consumer guide as a substance that can be of either animal or plant origin.
  • Panthenyl Ethyl Ether ::  This ingredient is a small synthetic molecule used as a hair conditioning agent.
  • Methylchloroisothiazolinone (I'm not even going to try to pronounce that one.), ::  Methylchloroisothiazolinone is a widely-used preservative; has been associated with allergic reactions. ALLERGIES - irritation to skin & immune system.
  • Methylisothiazolinone. ::  Methylisothiazolinone is a widely-used preservative; has been associated with allergic reactions. Lab studies on the brain cells of mammals also suggest that methylisothiazolinone may be neurotoxic. (Happy Happy Joy Joy)
After looking at this, it's no wonder I stopped using commercial hair shampoos. I've been sensitive to chemicals on my skin for as long as I can remember. Check  your own bottles and research the ingredients and see what you find.

As gross and unsettling as this may seem, you can still have squeaky clean hair naturally and completely without all of these nasty things, and for a fraction of the amount and without the toxins.

This may be the easiest recipe you'll ever make. To make a non-toxic, natural, environmentally friendly and healthy Shampoo. You need only two ingredients.

  1. 2 C. Water
  2. 2 Tbsp. Baking Soda
Yes. That's it. No more no less. Surprised? I was too. I find it easiest to use a squirt bottle, other wise you'll get more on the shower floor than in your hair. A cleaned out pump-spray bottle will do perfectly, or check out your local dollar store.

There may be a transition period where your hair may seem less than... how to put it... perfect, about 2 - 3 weeks, give or take. To make this transition easier, wean your hair from your normal shampoo.

For someone who washes their hair every day...
  • Week 1: Use the Baking Soda mix 2-3 times instead of shampoo
  • Week 2: Baking Soda Mix, 3-4 times
  • Week 3. 4-5 times
  • Week 4: 5-6 times
By the time you get to the end of that, You'll be using it all the time. 

Though you don't need to wash your hair every day, it is safe for daily use. However, if may strip out color in color treated hair, but that is true with just about any regular shampoo. This is also good for all hair types.


If you feel the need for some conditioning, Try spritzing your hair with Apple Cider Vinegar and leave it in and react to the baking soda for a minute or two before you rinse with water.

Does your hair have special needs? Try these variations on a theme to make it more friendly to you and your hair;


  • Control Static by massaging a tablespoon or two of olive oil and letting it set for a couple of minutes before you rinse.
  • Use an avocado and lemon juice mixture through out your hair, letting it set for 30 minutes then rinse.
  • Oily hair? The Baking soda mix should help with that, but if you need more oil control, mix an egg with some lemon juice, work it in, let it set for a few minutes and rinse.
  • Shampoo to thin? Add oatmeal flour. (Grind up some oats in your food processor or blender). You can also use cornstarch, or a mixture of both in the Baking soda/Water shampoo.
Give this a shot, let me know how it works for you. Remember you may have a transition period before your hair will return it's happiness with a smile, but your hair and your health will be better for it.

References:

How To: Fly Traps

HOUSEFLIES!!!!!!! ACK!

We know them. We have the. We HATE them. UGH!!! 

Like the rest of you, I've tried the fly paper in the little tubes. They're sticky, and make a mess on the walls and curtains and windows if they get stuck to them.

Fly traps -- can have toxic chemicals that can be dangerous to you, your household, your pets and your children if they ever get a hold of it.

On the other hand. If you don't get RID of the fly infestations, they'll sit on your food, eat it and lay eggs, which turn into maggots., so you can't safely leave anything out, including fruits YUCK!

We all have those stories. They are pests in the house and need to be gotten rid of, so below I've given you a a great easy way to use 3 house hold items to make a safe, non-toxic trap.

Supplies:
  • a couple sheets of paper (Scrap paper or old newspaper is just fine for this)
  • a jar
  • Apple Cider Vinegar
Instructions:
  1. Fill the jar with 1 inch of vinegar.
  2. Roll a couple sheets of paper into a funnel.
  3. Place the narrowest end into the jar and spread it out so it doesn't slide in.
The flies will be attracted to they fruity apple cider vinegar, walk/fly down the funnel to get to the "tastiness." They won't be able to find their way out. They will either drown or become exhausted and drown. Either way, you'll be free of flies. Change the vinegar every other day or so until your infestation is gone. Because it's non-toxic you can keep a trap going all the time to keep your home fly free. Put one in every room in the house if you so choose.

Do you have fly trapping tips? Share them!


Wednesday, May 2, 2012

How To: Curds & Whey

Little Miss Muffet 4by *intergalacticstock

I'm sure we many of us remember the old nursery rhyme about little miss muffet.

“Little Miss Muffet, sat on a tuffet,
eating her curds and whey.
Along came a spider who sat down beside her,
and frightened Miss Muffet away.”


Curds and Whey is what we usually call “cottage cheese” and it is readily sold in grocery stores. Large curd, small curd, whole milk, 2 percent, skim, so many name for the same basic thing that has been eaten for a millenia. Curds are the milk solids, and whey is the liquid that remains after curdling. Most of the time they are separated for cheese making, and the whey is tossed aside.


Did you know that you can make your own cottage cheese at home? Sure you can. Once you get this part down, than you can make a couple other types of fresh cheeses to enjoy.

For this recipe I prefer fresh raw whole milk, but conventional will do. I wouldn't go beyond 2% milk. The fat helps with mouth feel and proper coagulation. If you use convetional, I'd recommend organic. You'll get a better product.


What You'll Need:

  • ½ Gallon Whole or 2% Milk
  • 1/4 - 1/2 C. Lemon Juice
  • 1 tsp. Salt (or to taste)
  • Cheese cloth, muslin or a piece of clean cotton t-shirt.
  • A strainer. Plastic is preferred, but stainless steel will do. Do not use aluminum because it will react badly with the acid.
  • Heavy bottomed sauce pot.
  • Wooden spoon.
  • Glass bowl
  • Cold Water

On to the making...

  1. Put the colander into the bowl, then line the bowl with the cloth, at put it in your sink. We'll come back to this
  2. Pour the milk into a heavy bottom sauce pot, add salt and slowly bring to a boil. I don't go above medium heat for this. Check it constantly and stir gently. Milk will boil over very quickly so keep close tabs on it.
  3. Once it has come to a boil, turn down the head to a simmer, and slowly add the juice. Stirring as little as possible and VERY gently, so you don't break up the curds. Use your judgement here, if it needs more lemon juice, add it, but a little at a time.
  4. When the solids and liquid have separated, simmer for another 30 seconds or so.
  5. Pour the cheese and whey into the strainer. Lift your colander slowly so you don't splash yourself with hot liquids. Reserve the liquid in the bowl, and set that aside. Let the cheese drain.
  6. Run cold water on the curds, moving them gently around with your hand. This will remove the lemon juice flavor and firm up the curd slightly.
  7. Bundle up the curds, drain, and squeeze gently to get more liquid out.
  8. If you want the curd in smaller pieces, now is the time to do it. Be gentle. Use your hands.
  9. Put your strained curds into a storage container, and taste them to check the salt. Add more if you want to.
  10. Let the whey cool to room temperature if it hasn't already, then add about ¼ to a ½ cup of the whey into the curd. Stir gently to combine. Adjust the liquid to your personal preference.
  11. Snap on the lid of your container, and let it set in the fridge for a few hours. Come back and check if the liquid is still how you like it. Remove or add according to your taste. Put it back into the refrigerator for another 24 hours to let it set before eating.
  12. Enjoy your home made cottage cheese.
Once you get this whole curds and whey thing down, you can make paneer and queso fresco. They both start with this basic separation method. We'll explore those cheeses and more in my next post.

It's easier than it seems, I promise you. Once you get the hang of it, you'll be making it more and more. And do you remember that extra whey? That isn't a waste product. There are things we can do with it. It is still packed with nutrition and awesome enzymes for fermentation. I could write several more posts on those subjects, and I most certainly will.

   The Kitchen Witch Of The South