Love handicrafts? Shop small scale, use Etsy!

Showing posts with label recipe. Show all posts

Monday, October 15, 2012

Crash Course: Making Bread Pt 1

In this first of a continual series of crash courses, I'll be showing you how to make a basic loaf of bread. Nothing fancy or complex. This is just to get your feet wet. There will be a lot of pictures, and easy instruction. If you want something more complicated or creative, we'll do that in a different entry.

Why make your own bread:

Making your own bread is a great release of stress, especially when you're kneading it. You can get out so much frustration. Regardless of the emotional benefits (lol) you'll be learning how to make something useful, nutritious and delicious.

Regular commercial breads are full of excess salt, sugar, preservatives and yes folks, many times, high fructose corn syrup. Why does bread need HFCS? That's beyond me. When you feed your family, you'll feel good about it's simplistic wholesomeness, and enjoy it.

In another crash course, we'll discuss making your own sourdough starter by 2 simple ingredients and how to capture the wild yeasts floating around in the world.

About this Bread:

This is a basic white bread for slicing/tearing loaves, or rolls, or anything you need a simple bread for. There are a lot of bread recipes out there. You can find any flavor you'd like on the net. But, when shit hits the fan you're going to want to know how to make flour into something edible and nutritious. If you've made bread before, wonderful! If not, this is the crash course for you!

Ingredients:

1 pkg instant dry yeast
1 tsp. sugar (any natural sweetner is good. It is used to feed the yeast. DO NOT USE ARTIFICIAL CHEMICAL SWEETNERS!)
1 C. Warm Water @ 100 - 110 degrees Fahrenheit (More for Kneading)
2 Tbsp. oil (Any liquid cooking oil will work just fine)
1 Tbsp Salt (This is optional, but without it the bread will be very bland)
3 C. A/P Flour (More for kneading)

How To:

I like to clean as I go, so I make a sink of hot soapy water to drop in my utensils until I'm able to wash them.

In a large bowl, add 1 package of yeast.

To the yeast add 1 cup of warm water between 100 and 110 degrees Fahrenheit. You may need more water for kneading if it's too dry, so put some in a cup to have on hand.

  • Too cool - yeast will be slow to bloom if at all
  • Too warm - yeast will die
Add 1 tsp of sugar. Yeast eats sugar. The yeasts have been dormant and probably kept in the refrigerator (or at least it should be), so they're hungry. This will give them a good head start, so they'll burp and make the carbon dioxide gas that lets the bread rise and gives it its yeasty flavor. You won't taste the sugar.

Let the yeast nom on the sugar for about 10-15 minutes. The longer you let it chill the more developed the flavor will be. As long as the yeast stays at room temperature, you can keep this going for a while. The yeast will be foamy and fragrant. I start drooling at this point. Mmm so good!

Now, we'll start building the rest of the dough. Add 1 Tbsp of salt. Feel free to add more or less depending on how you like it. I do add some, because it can be terribly bland otherwise.

Add 3 Cups of flour. You may need more for as you knead if it's too sticky to keep some out in a dish to have on hand.


I start mixing it with a wooden spoon, until it tightens up, and starts forming a mass.

Add 1 tablespoon of oil. I add the oil after I have stirred a little well in the flour. This adds a little more moisture and helps with the sticky factor. You'll knead less, require less water/flour adjustments, resulting in a more tender texture.


It's BREAD HAAAAANNNND! No, but really. Once it starts looking like this from stirring, it's time to get your hands in there. Start working it in the bowl some, and let it come together a little more.

It's still going to be floury and flaky at this point. Turn it out onto your counter, or other kneading surface. Make sure that it is clean and dry before you start. Now knead my lil' breadsticks, KNEAD!!

Weather, and moisture content of ingredients can differ from batch to batch. But don't panic! This is easy to fix.

IF IT'S TOO DRY: Knead for a couple of minutes. If it is still too dry and not coming together any more and is just crumbling apart, you can add a little more water at this point. Only add 1 tablespoon at a time, and knead for a little bit before you add any more. It takes a few minutes for the flour to absorb the water. It will be a bit sticky to your hands while you knead it, but don't add more flour just yet. You'll see it will come together more and more. 

IF IT'S TOO WET: If it's too wet still, and sticks to the counter and your hands, sprinkle some flour on the counter, your hands and the dough. Knead it in. Keep repeating this until it is no longer sticky. Do this a little at a time. No more than a tablespoon or two. Let the flour absorb the moisture and combine itself.

Keep adjusting little by little and you'll get it. I promise. Bread making is very much a "feel" thing. Trust your instincts and take your time!

You can see from these pictures that the rough looking dough becomes smoother and smoother. It will also become more elastic as the gluten forms strings. This is what gives bread its texture, the gluten proteins. The more you work it the more chewy your bread will be.

Work your dough until it becomes smooth and consistent.


In a new clean bowl, or the same bowl you used to make the dough, add another tablespoon of oil. 


Coat the bowl and and dough ball with the oil. This will help it from forming a skin which would give you a tougher crust, and keep it from sticking to the bowl, too much as it rises.

Now cover the bowl with a clean dish cloth and keep in a warm place where it won't be bothered for no less than 1 hour. The longer it rises the more developed the flavor will become

.In Part 2: Punching down, 2nd rise, shaping, baking, finished product!

Tuesday, August 28, 2012

Portuguese Soup

This is a great recipe. My mom used to make it all the time. Despite the name, this is a very inexpensive, delicious and filling soup that is VERY easy to make. You can make it on the stove top or in the crock pot. Matter of fact, I have a batch in the crock pot right now.


Ingredients:

  • 1/2 lb ground beef (Substitute other ground protein if you wish)
  • 2 C. chopped onion
  • 3 cloves of garlic
  • 2 Tbsp. Olive Oil (I used 80/20 ground beef and omitted the extra oil)
  • 1 lg can whole stewed tomatoes
  • 2 tsp. salt
  • 1/4 tsp pepper (I also added some cayenne for some heat)
  • 2 qt. water
  •  1/2 tsp. dried thyme
  • 1/2 tsp. dried basil
  • 1/4 head of cabbage, shredded
  • 1 C. broken vermicelli
  • 1 pkg keilbasa (chorizo would also be very very good if you have it)
CROCKPOT: Dump it all in, turn onto highest setting, let cook for at least 4 hours. (Or until you get home)

STOVE TOP: brown mean, onion and garlic in oil. Add tomatoes, salt, pepper, sausage and water. Bring to boil. Cover, Simmer for about 20 minutes. Add thyme, basil, cabbage and pasta. Bring to boil. Cook until cabbage and pasta are soft.

YEP that's it. It freezes well and is even better eaten the next day, if it sticks around that long. 

Try it out. Let me know what you think and how you changed it to your liking.

My recipes are merely guidelines. I change stuff all the time depending on what's in season and/or on sale, and to my taste. I like more heat than my mom, so I add cayenne. You can too. Try it as is, then change it up :D

Have fun with it. Yum Yum.

Wednesday, July 11, 2012

Recipe: Taco Pie

It's like a taco, a casserole and a lasagna had an orgy!


Ingredients

  • 1 lb ground meat or Veggie Substitute (Works great with x-tra firm tofu)
  • 1 pkg taco seasoning
  • 1 pkg of shredded cheese. (I used sargentto taco blend)
  • 4 oz whole milk ricotta
  • 6 whole wheat tortillas
Instructions
  1. Brown meat thoroughly.
  2. Add taco seasoning to meat. Mix to combine.
  3. Cut 6 tortillas in half.
  4. Layer the cut sides of 4 of the tortilla halves against the walls of a 9" x 9" square pan, overlapping them to make the base.
  5. Spread some ricotta on the tortilla.
  6. Sprinkle a little cheese.
  7. Put 1/3 of the meat.
  8. Layer 4 more tortilla halves, ricotta, meat  and cheese.
  9. Repeat step 8 one more time, holding back some shredded cheese for the top.
  10. Sprinkle a layer of cheese on the very top.
  11. Put into a 350*F oven for 15-20 minutes or until the top cheese is bubbly and the casserole is heated through.
  12. Cut, serve, enjoy!

Sunday, June 3, 2012

Rockin' Recipes: Salsa Chicken in Springroll Cups


My 2 thighs were small. This made 9 pieces.
Ingredients:

  • 2 left over roasted chicken thighs, skin removed, and pulled from bone.
  • 3 Tbsp of your favorite salsa
  • 1/2 a Medium Onion
  • 4 slices of REAL American cheese, or cheddar (Not pasturized processed cheese food. REAL CHEESE PEOPLE)
  • Egg Roll wrappers
  • Pinch of salt
  • Oil for muffin tin.
Instructions:

  1. Preheat the oven to 350 degrees Fahrenheit.
  2. In a food processor, put the chicken, salt, salsa and onion. Buzz until your desired consistency. I went for almost pate style with just a little chunk.
  3. Oil the muffin tin.
  4. Line each cup with a wanton wrapper, add filling, til ALMOST full, fold over sides allowing them to overlap each other. Do this for each cup that you have filling for.
  5. Since the chicken is cooked, we're just browning the wantons, and heating the insides. So bake for about 20 minutes or until golden brown and delicious.
I've also filled wantons with banana and nutella for dessert. OMG To Die For! You can do these same cups with all sorts of fillings; sweet or savory. Fill it with your favorite things, throw it in the oven for something extra special.

Another option is use a mini muffin tin, use wanton wrappers to make appetizers for parties without breaking the bank!

Thursday, May 31, 2012

Replace It: Laundry Detergent: Powder

As with the shampoo we discussed earlier, laundry detergents have the same problem; a whole mess of chemicals that aren't good for us, or our planet. It's so crazy easy, you can make great big batches for a fraction of what a box or a bottle costs. It is just as effective. You're less likely to have an allergic reaction, and you can either scent it or leave it plain.


What you'll need:

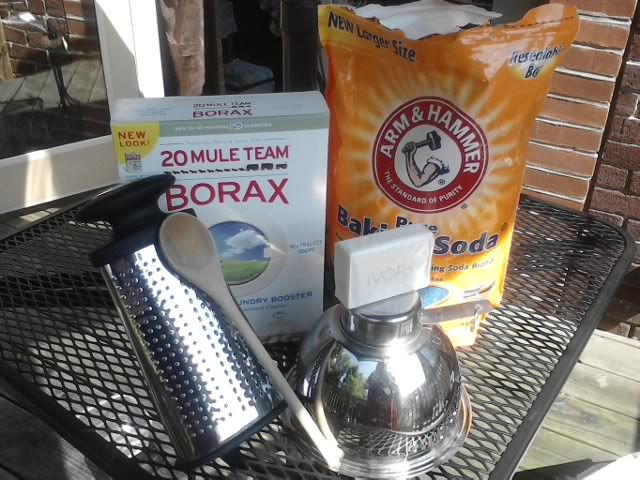
  • 1 bar of plain Ivory or Castile soap (Don't get all fancy with this, moisturizes and scents won't help you wash your clothes. Plain old basic soap is all you need)
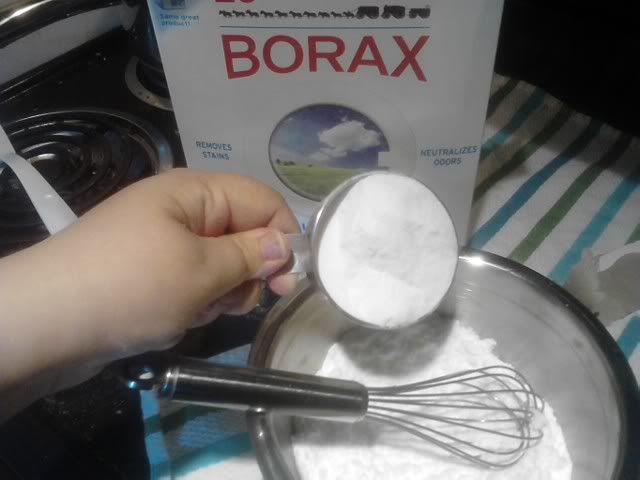
  • 1 Cup of Borax
  • 1 Cup of Baking Soda
  • Optional: 1 Tbsp finely ground herbs or 10 - 12 drops of essential oils (experiment with amounts in this. It's for fragrance. a little goes a long way, but make it the way you're happy with it.)
  • A container large enough to hold it
  • A cheese grater
  • A whisk or spoon
Instructions: (WITH PICTURES!!!)


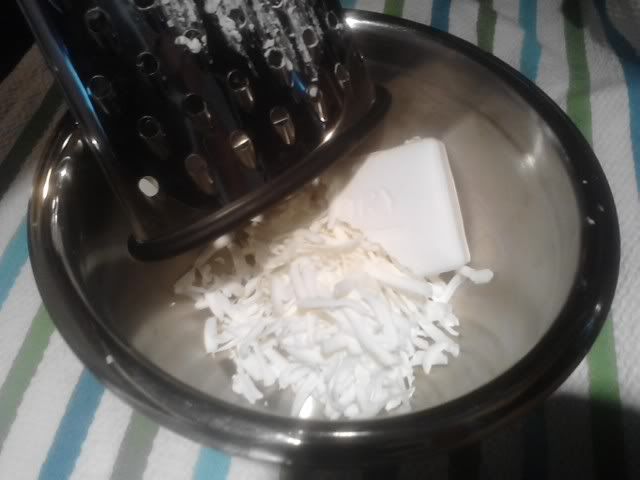
1. Grate the soap.
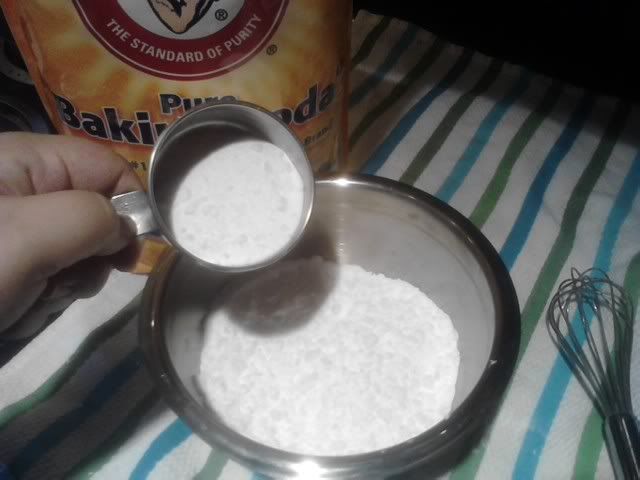
2. Add Baking Soda
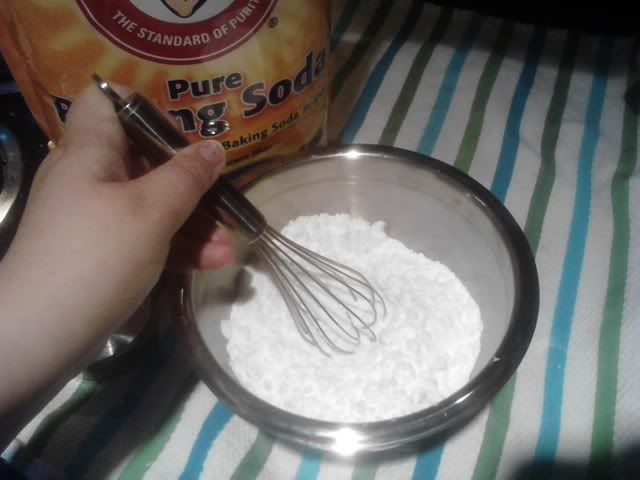
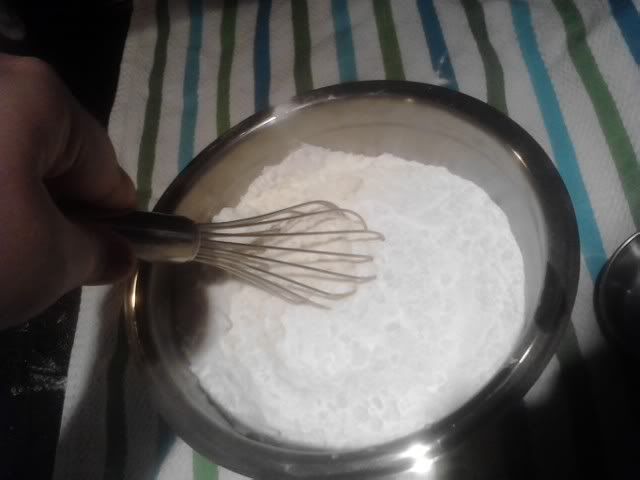
3. Stir
4. Add Borax
5. Stir
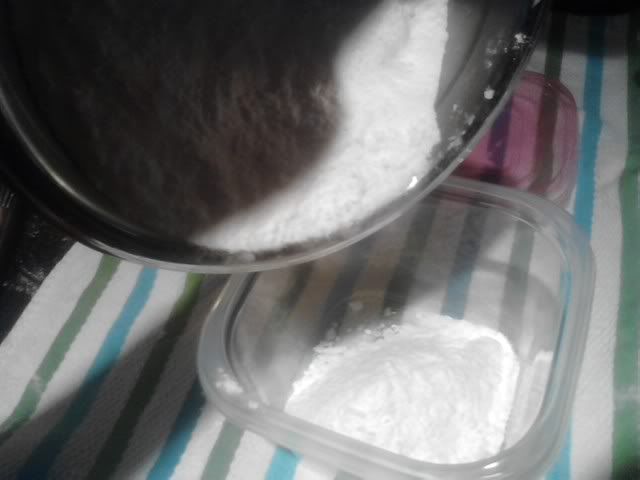
6. Add to storage container.
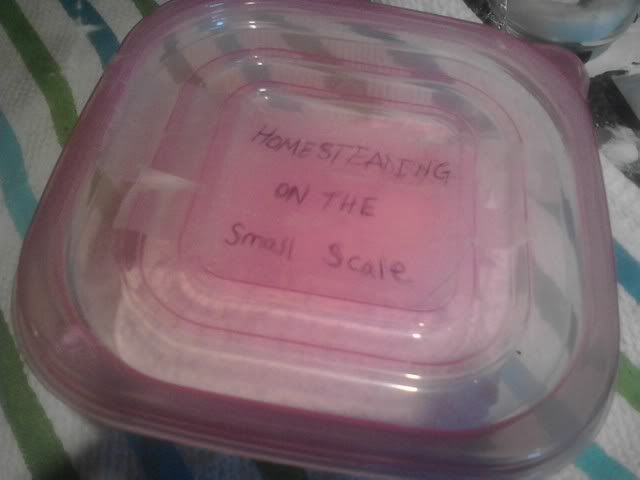
7. Seal and Label!

Use:
 1-2 Tbsp per regular load. Use more or less depending on how soiled your clothes are and the size of the load. 

It will make approximately 32 -64 loads depending on  the amount you use, but it's so inexpensive, you can easily make more when you want it!

Oh, you wanted liquid detergent? No problem...


Have you tried this? Know other laundry soap recipes? Tell us about it!! 

Tuesday, May 15, 2012

How To: Make your own Kefir!

*NOTE: I will be adding photos to this post during my next batch, so it won't always be empty.*

These instructions are what I follow. I got them from the farm I buy my raw milk from. There are other instructions to be found on the net. They are all very similar to this. What I like about the instructions from "The Family Cow" farm is that it is very 1, 2, 3 -- very step by step which is how I like it. It's a list. I LOVE LISTS!

What you will need:

  • Jar or Crock (We prefer a stoneware crock)
  • Real Kefir Grains
  • Raw Milk (Preferably from Certified Organic Jersey! :) )
  • Cloth or towel
  • Colander or strainer (holes should be about 1/16th in diameter)
  • Bowl
  • Wooden spoon or spatula
To start the process:
  1. Place the entire contents of "Kefir Starter Grains" into the crock or jar.
  2. Pour 1 quart of milk over grains. (Keep down 1" or so from rim as milk will expand)
  3. Cover with a cloth or towel to keep flies/dirt out but still let oxygen in.
  4. Let sit at room temperature for 24 hours to culture. Do not set in sunlight.
  5. Stir cultured Kefir to break up the thickness to make it easier to strain. Do not be alarmed at the curdled look of the kefir. Curds are a perfectly normal part of cheese, yogurt, and kefir making.
  6. Set the colander on top of the bowl and pour the kefir into it. Use the spoon to help the kefir through. Do not rinse the grains after you strain them. In fact, it would be better to leave a few curds with them.
  7. Return the grains to the fermentation crock to be ready for the next batch. After several batches, you'll notice that you have more grains than you started with. When you have 1 cup or more, you may start culturing 1/2 a gallon at a time... or, find a friend who wants some kefir grains. *NOTE: I WILL LET YOU KNOW WHEN I HAVE SOME READY FOR THOSE THAT WANT THEM, AS THEY BECOME AVAILABLE*
  8. Place the freshly strained Kefir in the refrigerator to chill.
  9. Puree your choice of fruit (frozen is best) in a food processor or blender. Then add the chilled kefir along with sugar, maple syrup. (I PREFER HONEY) or other sweetener to suit your taste. It is totally up to you to decide how sweet you like it or what flavors to add. We enjoy banana, peach, strawberry, blueberry, nectarine, orange, apricot or even a blend of several. Your imagination is the limit.
Kefir Smoothie - Honey, Banana and Strawberry. I used the food processor.
(Mothers, try freezing cool pops with Kefir instead of kool-aid. Your children will love them!... or freeze a pan of kefir and then process the frozen Kefir with frozen fruit, and a little extra sugar. (It tastes almost exactly like sherbet.)

To start the next batch: Place the grains in the fermentation jar, refill it with milk and repeat the whole process.

To take a short break from kefir making: Place the grains in a small container, cover with milk, cover container with a paper towel or cloth secured by a rubber band, and refrigerate. The cold temperatures will only allow a very slow fermentation. Important: Change the milk every week so the probiotic bacteria do not starve. The first batch or so will take longer than 24 hours to ferment til the grains get revived from their dormancy.

To take a long break: Rinse the grains with water and lay them on a paper towel to dry. When they are totally dry, place the grains in a container and store in your kitchen cupboard. They have been known to keep up to 2 or 3 years like this. When you are ready to start again, simply place the grains in milk like you would for a normal batch of kefir. The first batch will take longer than 24 hours to ferment til the grains get fully re-hydrated and revived.


If you use an antibacterial soap or something like Clorox to wash the container (WHICH IS NOT A GOOD IDEA) you are using for fermenting, be VERY careful to rinse it well as any residuals will KILL the grains. it is actually NOT necessary to wash your fermentation jar every time. The little bit of kefir left on the inside will help start the next batch.

Happy Kefir Making!

Interesting Study: Google "Health/Kefir"

Wednesday, May 9, 2012

Recipe: Garam Masala

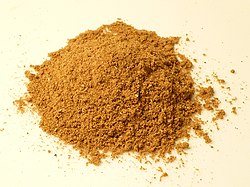
There are hundreds of Garam Masala recipes on the internet and in books. Like most cultures, there is a certain thing that every family has their own recipe for. This is one of those. It's the basic flavoring in Indian cuisine. It literally means warming spice.

This is the recipe that I use, but remember, this merely a guideline. Try it, and once you master this basic one you can start adding yourself into it and make it just they way you like it.

  • 4 tbsps coriander seeds
  • 1 tbsp cumin seeds
  • 1 tbsp black peppercorns
  • 1 ½ tsps black cumin seeds (shahjeera)
  • 1 ½ tsps dry ginger
  • ¾ tsp black cardamom (3-4 large pods approx)
  • ¾ tsp cloves
  • ¾ tsp cinnamon (2 X 1” pieces)
  • ¾ tsp crushed bay leaves

Recipe: Lazy Mattar Paneer

I adore Indian food, and I made Mattar Paneer a few weeks ago. Nothing beats home made anything including my fresh paneer, however, I hadn't had time this week to make any and I had similar bits and bobs in my kitchen but not the "Exact" stuff. So this is what I did.

Ingredients:

  • 1/2 large ball of Mozarella (cubed)
  • 1/2 C. Basic Pasta Sauce (Ragu Classic works very well)
  • 1 Tbsp. Garam Masala (I'll post my recipe for this, but store bought is just fine)
  • 1 Tbsp Butter
  • 1/4 C. Milk, Cream or Coconut Milk
  • 1  bag Frozen Green Peas
Instructions:

  1. Melt butter
  2. Add peas, stir to coat and to heat through
  3. Add sauce, stir.
  4. Add Garam Masala, stir.
  5. Add Milk, stir.
  6. Add cheese, stir until it just starts to melt.
  7. Take it off and put into a bowl so the cheese dosen't melt more than it has to.
Notes:
Paneer does not melt. It is a fresh milk cheese, which is similar in flavor to ricotta. So a mild fresh cheese like  Mozz works well, but it can get a bit melty. It's important to take the peas off the heat just as the cheese begins to soften, unless of course that is what you desire, then go melty! Quesco Blano, or Queso Fresco would also be good choices.

   The Kitchen Witch Of The South