Friday, November 16, 2012
Wednesday, November 14, 2012
Wednesday, October 24, 2012
Be Beautiful | Beauty Blog: DIY Lavender & Chamomile Bath Melts
Be Beautiful | Beauty Blog: DIY Lavender & Chamomile Bath Melts: For some reason I've had an influx of requests for the recipe for my lavender bath melts that I wrote about over a year ago! I posted pi...
Recipe: Lavender Body Butter
I am going to have to try this
Lavender Body Butter
I got sunburned today while turning soil for my tomato bed. Since I finished my aloe moisturizer this morning, I realized I didn't have anything to sooth my sore skin. So, I "whipped up" this simple, relaxing, and rejuvenating lavender body butter
Ingredients:
4 Tbsp Coconut oil
1.5 Tbsp Olive oil
2 Tbsp. Beeswax
1 Tsp. Honey
3 Tbsp. Aloe Vera gel
2 Tsp. Lanolin
10 drops Lavender essential oil
1 Vitamin E capsule
Directions:
- In double boiler over medium-high, heat oils, beeswax and honey.
- In a separate double boiler over medium-high, heat aloe. Once melted, mix into beeswax mixture. Stir.
- Add lanolin & stir.
- Once mixture has melted, turn heat to low. Stir in Vitamin E and essential oil. Whip until smooth.
- Pour into small glass jars and let cool before covering.
If I can get things together, this may be one of my crash courses.
Monday, October 15, 2012
Crash Course: Making Bread Pt 2
So it's been an hour or so, let's check on the dough...
 Hmm, it's looking pretty good, but I want to have a more tender crumb and a more developed flavor. I'll check back in another hour.
Now if you like what your dough is doing in with an hour rise, then by all means, use it. There is absolutely nothing wrong with the dough and it will be WONDERFUL!
My house is a bit on the cool side. I let it rise for about 3 hours total. This is what looks like:
 -------------------------------------------------------------------------------------------------------
 Punch that dough DOOOOOOWN!
 See how it stays indented? Perfect!
 Knead it a little to get the large air bubbles out.
 Now it's time to shape it. Here I'm a bit more gentle with the kneading, but at the same time i'm rolling the ends under. This is merely cosmetic as I shape the loaf.
 It's log, log. It's big. It's heavy. It's... BREAD! From this point, you could cut it into equal sized pieces and make roll shapes and put it on a cookie sheet, or keep the rustic shape and put it on the pan. You of course can make any shape you want, and mark the top. I put it in a loaf pan.

 From here, let it proof til it doubles in size once again.
Preheat your oven to 375 degrees Fahrenheit...
Because it's close to Samhain/Halloween, I marked it with a pentagram using the tip of a sharp knife. As the bread rises and puffs it will be quite lovely.

Update @ 7:38 PM 10/15/2012: It's almost done. I never get tired of the scent of baking bread, never. Mmmmmmmmmmm. That reminds me, I need to go to the health food store to get local organic pastured (Not Pasteurized) raw cream to make butter for this delicious bread. And yes, I'll show you how to make that too!
 Time to get out the cooling racks if you have em. If not a clean dish towel will work just fine.
 Take the loaf out. The top should be slightly brown. It should be hard and with almost a hollow thud sound.
Cool it in the pan until it comes out on its own, otherwise it can break apart. The proteins in the wheat flour need to set up a bit.
Once it can come out on its own, cool it the rest of the way on a cooling rack or on the dish towel.
This loaf slices very well, with a nice crunchy crust. It goes nicely with a soup or stew to sop up the broth.
It also freezes and refrigerates excellently. I keep it in the fridge so it lasts longer. It slices better when chilled.
I slice it for sandwiches, toast and use the ends of the bread to make croutons or bread crumbs if I don't eat them first!
It is crusty, crunchy and a lovely chewy texture.
I hope you enjoy this basic bread crash course as much I enjoyed putting it together. And once you get this down, you can experiment with flavors, flours, bread types. The possibilities are endless.
If you have any questions, ask away. I'll be happy to help you.
*I am not a chef professional or otherwise. I'm a home cook, a survivalist and a homesteader. I've been making bread by hand since i was a child at my grandmother's knee. This is what she taught me. This is by no means the only method or recipe.*
Now if you like what your dough is doing in with an hour rise, then by all means, use it. There is absolutely nothing wrong with the dough and it will be WONDERFUL!
My house is a bit on the cool side. I let it rise for about 3 hours total. This is what looks like:
Preheat your oven to 375 degrees Fahrenheit...
Because it's close to Samhain/Halloween, I marked it with a pentagram using the tip of a sharp knife. As the bread rises and puffs it will be quite lovely.
Then into the oven it goes for 45 minutes. I use the same time when making rolls from the dough.
Update @ 7:38 PM 10/15/2012: It's almost done. I never get tired of the scent of baking bread, never. Mmmmmmmmmmm. That reminds me, I need to go to the health food store to get local organic pastured (Not Pasteurized) raw cream to make butter for this delicious bread. And yes, I'll show you how to make that too!
Cool it in the pan until it comes out on its own, otherwise it can break apart. The proteins in the wheat flour need to set up a bit.
Once it can come out on its own, cool it the rest of the way on a cooling rack or on the dish towel.
This loaf slices very well, with a nice crunchy crust. It goes nicely with a soup or stew to sop up the broth.
It also freezes and refrigerates excellently. I keep it in the fridge so it lasts longer. It slices better when chilled.
I slice it for sandwiches, toast and use the ends of the bread to make croutons or bread crumbs if I don't eat them first!
It is crusty, crunchy and a lovely chewy texture.
I hope you enjoy this basic bread crash course as much I enjoyed putting it together. And once you get this down, you can experiment with flavors, flours, bread types. The possibilities are endless.
If you have any questions, ask away. I'll be happy to help you.
*I am not a chef professional or otherwise. I'm a home cook, a survivalist and a homesteader. I've been making bread by hand since i was a child at my grandmother's knee. This is what she taught me. This is by no means the only method or recipe.*
Crash Course: Making Bread Pt 1
In this first of a continual series of crash courses, I'll be showing you how to make a basic loaf of bread. Nothing fancy or complex. This is just to get your feet wet. There will be a lot of pictures, and easy instruction. If you want something more complicated or creative, we'll do that in a different entry.
Why make your own bread:
Making your own bread is a great release of stress, especially when you're kneading it. You can get out so much frustration. Regardless of the emotional benefits (lol) you'll be learning how to make something useful, nutritious and delicious.
Regular commercial breads are full of excess salt, sugar, preservatives and yes folks, many times, high fructose corn syrup. Why does bread need HFCS? That's beyond me. When you feed your family, you'll feel good about it's simplistic wholesomeness, and enjoy it.
In another crash course, we'll discuss making your own sourdough starter by 2 simple ingredients and how to capture the wild yeasts floating around in the world.
About this Bread:
This is a basic white bread for slicing/tearing loaves, or rolls, or anything you need a simple bread for. There are a lot of bread recipes out there. You can find any flavor you'd like on the net. But, when shit hits the fan you're going to want to know how to make flour into something edible and nutritious. If you've made bread before, wonderful! If not, this is the crash course for you!
Ingredients:

1 pkg instant dry yeast
1 tsp. sugar (any natural sweetner is good. It is used to feed the yeast. DO NOT USE ARTIFICIAL CHEMICAL SWEETNERS!)
1 C. Warm Water @ 100 - 110 degrees Fahrenheit (More for Kneading)
2 Tbsp. oil (Any liquid cooking oil will work just fine)
1 Tbsp Salt (This is optional, but without it the bread will be very bland)
3 C. A/P Flour (More for kneading)
How To:
 I like to clean as I go, so I make a sink of hot soapy water to drop in my utensils until I'm able to wash them.
 In a large bowl, add 1 package of yeast.
 To the yeast add 1 cup of warm water between 100 and 110 degrees Fahrenheit. You may need more water for kneading if it's too dry, so put some in a cup to have on hand.


Why make your own bread:
Making your own bread is a great release of stress, especially when you're kneading it. You can get out so much frustration. Regardless of the emotional benefits (lol) you'll be learning how to make something useful, nutritious and delicious.
Regular commercial breads are full of excess salt, sugar, preservatives and yes folks, many times, high fructose corn syrup. Why does bread need HFCS? That's beyond me. When you feed your family, you'll feel good about it's simplistic wholesomeness, and enjoy it.
In another crash course, we'll discuss making your own sourdough starter by 2 simple ingredients and how to capture the wild yeasts floating around in the world.
About this Bread:
This is a basic white bread for slicing/tearing loaves, or rolls, or anything you need a simple bread for. There are a lot of bread recipes out there. You can find any flavor you'd like on the net. But, when shit hits the fan you're going to want to know how to make flour into something edible and nutritious. If you've made bread before, wonderful! If not, this is the crash course for you!
Ingredients:
1 pkg instant dry yeast
1 tsp. sugar (any natural sweetner is good. It is used to feed the yeast. DO NOT USE ARTIFICIAL CHEMICAL SWEETNERS!)
1 C. Warm Water @ 100 - 110 degrees Fahrenheit (More for Kneading)
2 Tbsp. oil (Any liquid cooking oil will work just fine)
1 Tbsp Salt (This is optional, but without it the bread will be very bland)
3 C. A/P Flour (More for kneading)
How To:
- Too cool - yeast will be slow to bloom if at all
- Too warm - yeast will die
Add 1 tsp of sugar. Yeast eats sugar. The yeasts have been dormant and probably kept in the refrigerator (or at least it should be), so they're hungry. This will give them a good head start, so they'll burp and make the carbon dioxide gas that lets the bread rise and gives it its yeasty flavor. You won't taste the sugar.
Let the yeast nom on the sugar for about 10-15 minutes. The longer you let it chill the more developed the flavor will be. As long as the yeast stays at room temperature, you can keep this going for a while. The yeast will be foamy and fragrant. I start drooling at this point. Mmm so good!
Now, we'll start building the rest of the dough. Add 1 Tbsp of salt. Feel free to add more or less depending on how you like it. I do add some, because it can be terribly bland otherwise.
Add 3 Cups of flour. You may need more for as you knead if it's too sticky to keep some out in a dish to have on hand.
I start mixing it with a wooden spoon, until it tightens up, and starts forming a mass.
Add 1 tablespoon of oil. I add the oil after I have stirred a little well in the flour. This adds a little more moisture and helps with the sticky factor. You'll knead less, require less water/flour adjustments, resulting in a more tender texture.
It's BREAD HAAAAANNNND! No, but really. Once it starts looking like this from stirring, it's time to get your hands in there. Start working it in the bowl some, and let it come together a little more.
It's still going to be floury and flaky at this point. Turn it out onto your counter, or other kneading surface. Make sure that it is clean and dry before you start. Now knead my lil' breadsticks, KNEAD!!
Weather, and moisture content of ingredients can differ from batch to batch. But don't panic! This is easy to fix.
IF IT'S TOO DRY: Knead for a couple of minutes. If it is still too dry and not coming together any more and is just crumbling apart, you can add a little more water at this point. Only add 1 tablespoon at a time, and knead for a little bit before you add any more. It takes a few minutes for the flour to absorb the water. It will be a bit sticky to your hands while you knead it, but don't add more flour just yet. You'll see it will come together more and more.
IF IT'S TOO WET: If it's too wet still, and sticks to the counter and your hands, sprinkle some flour on the counter, your hands and the dough. Knead it in. Keep repeating this until it is no longer sticky. Do this a little at a time. No more than a tablespoon or two. Let the flour absorb the moisture and combine itself.
Keep adjusting little by little and you'll get it. I promise. Bread making is very much a "feel" thing. Trust your instincts and take your time!
You can see from these pictures that the rough looking dough becomes smoother and smoother. It will also become more elastic as the gluten forms strings. This is what gives bread its texture, the gluten proteins. The more you work it the more chewy your bread will be.
Work your dough until it becomes smooth and consistent.
In a new clean bowl, or the same bowl you used to make the dough, add another tablespoon of oil.
Coat the bowl and and dough ball with the oil. This will help it from forming a skin which would give you a tougher crust, and keep it from sticking to the bowl, too much as it rises.
Now cover the bowl with a clean dish cloth and keep in a warm place where it won't be bothered for no less than 1 hour. The longer it rises the more developed the flavor will become
.In Part 2: Punching down, 2nd rise, shaping, baking, finished product!
.In Part 2: Punching down, 2nd rise, shaping, baking, finished product!
Thursday, October 11, 2012
Sunday, October 7, 2012
So you want to build a solar oven. Pt 1
So you want to build a solar oven? Good Luck!
There are kits you can buy, or you can buy more heavy duty materials to make it last longer. Well I'm broke as balls; you know "welfare budget" and all, so I wanted to figure out how to do it with found objects, things I had around the house, and minimal purchase, but from things only found at the local dollar store. Information about the benefits and blah dee blah of solar ovens will come in a different post.
Pictures will come as I make it happen, and so I'll write this sort of like a diary...
Day 1: 10/7/2012
Dear Diary,
Today I want to build a solar oven. I've seen examples and web pages and want to see about building one of my own.
I have a lot of cardboard boxes around here, let's see what i can come up with.
I made from parts of 1 box, a 15" x 15" with 6" sides. I taped it with duct tape, just to hold it together, so i could have my hands free.
The great thing with this is that I can always build the sides up by gluing and taping more cardboard. Perfection and beauty not required.
I want to essentially paper mache the cardboard to make it more durable. So I made home made Mod Podge like this:
1 Pint Mason Jar
1 Bottle All-Purpose White Glue (Like Elmer's, but a generic brand will be just fine. It needs to be non-toxic. This type of glue does not release under heat.)
Into the jar, I poured the bottle of glue, which a typical bottle will be just a little less than half of the jar. I filled the rest with water, put on the lid, shook, a voila; home made mod podge for a fraction of the price. I think I paid 37 cents for mine from the clearance shelf at Walmart.
I used brown paper shopping & lunch bags, because that's what I have at the moment, and pasted on a layer on the box and I'm letting that dry tonight.
I also am using a cooling rack with a piece of cardboard cut to the size of the top, duct taped it in place, and have the bottom pasted with brown paper too. I'm letting that dry tonight as well. That will be the base of the "cooking" part of the oven, where I'll be pasting aluminum foil.
The Outside box is larger than the inside box. I'll be crumpling newspapers to put in between the two. The air between them as well as the newspaper will insulate allowing the cooker to be more efficient with less heat loss.
That's all I've done for tonight. I'll check back tomorrow.
*Disclaimer* There are fantastic free plans, and kits out there available over the internet. This is not the ONLY right method. This is an experiment. If it works, great. If it doesn't, well, we'll try something else.
Friday, September 28, 2012
10 Uses For Wood Ash
Articles - Survival-Tube

1. De-skunk pets. A handful rubbed on Fido's coat neutralizes the lingering odor.
2. Hide stains on paving. By sprinkling ash directly on the spot.
3. Enrich compost. Before the organic compound get applied to soil, enhance its nutrients by sprinkling in a few ashes. Adding too much, though, ruins the mix.
4. Block garden pests. Spread evenly around garden beds, ash repels slugs and snails.
5. Melt ice. It adds traction and de-ices without hurting soil or concrete underneath.
6. Control pond algae. One tablespoon per 1,000 gallons adds enough potassiumm to strengthen other aquatic plants that compete with algae, slowing its growth.
7. Pump up tomatoes. For the calcium-loving plants, place 1/4 cup right in the hole when planting.
8. Clean glass fireplace doors. A damp sponge dipped in the dust scrubs away sooty residue.
9. Make soap. Soaking ashes in water makes lye, which can be mixed with animal fat and then boiled to produce soap. Salt makes it harden as it cools.
10. Shine silver. A paste of ash and water makes a dandy nontoxic metal polisher.
Thursday, September 27, 2012
Wednesday, September 26, 2012
Making Body Butter Bars
From: http://ourgreenexperiments.blogspot.com/

This idea originally came to me after my soon-to-be-husband fell in love with the Buffy Body Butter Bar from Lush. He didn't care so much about the exfoliation aspect, but he really enjoyed being able to moisturize in the shower. I was really happy that he enjoyed Lush's product (I like stuff from Lush, I figured it would be easier for me to get away with buying stuff from there), but they are $12 each. That was a cost that I couldn't stomach to pay all the time (and I didn't particularly care for the scent either). I found this great informative youtube video on how Lush makes its body butter bar and knew I could do it at home myself.
Body Butter Bars
You'll Need
Mold (I used a silicone cupcake tin)
Double boiler of some sort
Shea Butter
Coconut Oil
Beeswax
1) Determine how much weight your mold can hold. I did this by placing my mold on my kitchen scale, hitting tare, and pour water in to the desired fullness. If you're using something like a cupcake tin, or something with multiple cavities you can just fill one and then multiply by the number of cavities. My cavities held 2 oz of water, so I needed a total of 24 oz of oils.


**NOTE: When buying beeswax, it's probably better to buy the pastilles or 1 oz blocks. I bought the 1 lb blocks because they were cheaper (I regret that decision). It took me 10 minutes to figure out how I was going to break down that block of beeswax. I ended up just breaking it into pieces with a hammer.**
3) Melt oils. You can do this step however you feel comfortable. Options include in the microwave, crockpot or using some sort of double boiler. My double boiler was actually a steaming pot that I set a 4 cup, glass Pyrex measuring cup in (it made for easy pouring).

I did find that the oils melted faster if I put the lid on. Also the beeswax takes the longest to melt so you might want to put that on the bottom.


4) Pour melted oil into mold.

5) Put mold in freezer. My bars were completely cooled in 33 minutes. (I know because that's exactly how long I was exercising)

6) Remove from mold and enjoy! After taking my bars out the mold, I wrapped the ones I didn't intend to use right away in wax paper and put them in the freezer. The one I'm currently using is in a metal tin in my bedroom.
That's it. It's super easy and doesn't require a lot of work. I guess the real question is economical is this?
7 lbs coconut oil: $17.95
5 lbs shea butter: $50.85
5 lbs beeswax: $52.60
7 lbs = 112 oz
5 lbs = 80 oz
17.95 / 112 = $0.16/oz coconut oil
50.85 / 80 = $0.64/oz shea butter
52.60 / 80 = $0.66/oz beeswax
($0.16 x 8) + ($0.64 x 8) + ($0.66 x 8) = $11.68 for 12 body butter bars
OR
$0.97 per bar
Not to toot my own horn but I don't think anyone could deny that this wasn't a successful experiment. Up next I'm going to be making stick deodorant. I just have to find some of those little tubes first.
Until next time,
Kellan

Three Key Valuable Honey Properties
From the Benefits of Honey website. For more information, click their banner above:
Be pleasantly surprised by these amazing honey properties -- antimicrobial, antioxidant, and hygroscopic which all make honey a popular food as well as a medicine.
1. Honey is Hygroscopic
Honey has a hygroscopic nature, which means when exposed to air, it naturally absorbs moisture in from the air. In treating open wounds, honey is useful as it could help prevent scarring by keeping the skin moist, encourage the growth of new tissues, and allow easy removal of any dressing by preventing dressing from becoming stuck to the skin. Honey's hygroscopic properties also make it an ideal ingredient in a lot of cosmetics as it helps keep skin hydrated and fresh and prevents drying. Thus, some people call honey a natural "humectant" as it attracts and retains moisture. When used in skin and hair treatments, honey trap and seal in the moisture leaving skin soft and supple, and hair glossy and healthy.2. Honey is Antibacterial
Researchers began to document the healing properties of honey in the early part of the 20th century. This ceased with the development of antibiotics but recently the development of resistance to antibiotics has led to a resurgence of interest into the healing properties of honey. The effectiveantimicrobial agent in honey prohibits the growth of certain bacteria. It contains an enzyme that produces hydrogen peroxide which is believed to be the main reason for the antimicrobial activity of honey. As such, honey is a useful treatment for wounds and scalds. Cuts, abrasions and scalds can be covered in honey to prevent bacteria from entering the wound and promote healing.
Honey can help treat minor acne by attacking the bacteria that cause the outbreaks while moisturizing the skin to aid rejuvenation. Types of honey differ greatly in their antimicrobial potency, varying as much as a hundred fold. Honey derived from the Manuka bush, found in abundance in New Zealand, claims the highest potency of such antimicrobial properties.
Read more in: Honey the Tastiest Antibiotic.
3. Honey is a Source of Antioxidants
Honey contains natural antioxidant properties that can destroy biologically destructive chemical agents which have been linked to many diseases such as cancer. Studies also found that dark-color honeys such as Buckwheat seem to possess more antioxidants than light-color varieties. Not only could honey's antioxidants help to eliminate free radicals in the body, they are also part of the nutrient supply for growth of new tissue. These precious honey properties help protect the skin under the sun and help the skin to rejuvenate and stay young-looking. As such, there have been an increasing number of manufacturers of honey skincare products such as sunscreens and facial cleansing products for treating damaged or dry skin.
Read more in: Sweetest Dose of Antioxidant.
Learn much more about the Benefits of Antioxidants .
Saturday, September 22, 2012
Simple, Green, Frugal Co-op: Crockpot Soapmaking
Crockpot Soapmaking
by Lynn at Viggies Veggies
I'd been planning on waiting to learn to make soap for a while yet, because I'd heard it made to sound so expensive and complicated. But my net.friend Dilli recently tested out a crockpot soap recipe she found that demystified the process for me. It's pretty well fool proof. And while talking to her about it, I realized I didn't need any special supplies or equipment. The only thing I purchased to start was an inexpensive bottle of lye from the hardware store...
I'd been planning on waiting to learn to make soap for a while yet, because I'd heard it made to sound so expensive and complicated. But my net.friend Dilli recently tested out a crockpot soap recipe she found that demystified the process for me. It's pretty well fool proof. And while talking to her about it, I realized I didn't need any special supplies or equipment. The only thing I purchased to start was an inexpensive bottle of lye from the hardware store...
Simple, Green, Frugal Co-op: Crockpot Soapmaking
Tuesday, August 28, 2012
Portuguese Soup
This is a great recipe. My mom used to make it all the time. Despite the name, this is a very inexpensive, delicious and filling soup that is VERY easy to make. You can make it on the stove top or in the crock pot. Matter of fact, I have a batch in the crock pot right now.

Ingredients:

Ingredients:
- 1/2 lb ground beef (Substitute other ground protein if you wish)
- 2 C. chopped onion
- 3 cloves of garlic
- 2 Tbsp. Olive Oil (I used 80/20 ground beef and omitted the extra oil)
- 1 lg can whole stewed tomatoes
- 2 tsp. salt
- 1/4 tsp pepper (I also added some cayenne for some heat)
- 2 qt. water
- 1/2 tsp. dried thyme
- 1/2 tsp. dried basil
- 1/4 head of cabbage, shredded
- 1 C. broken vermicelli
- 1 pkg keilbasa (chorizo would also be very very good if you have it)
CROCKPOT: Dump it all in, turn onto highest setting, let cook for at least 4 hours. (Or until you get home)
STOVE TOP: brown mean, onion and garlic in oil. Add tomatoes, salt, pepper, sausage and water. Bring to boil. Cover, Simmer for about 20 minutes. Add thyme, basil, cabbage and pasta. Bring to boil. Cook until cabbage and pasta are soft.
YEP that's it. It freezes well and is even better eaten the next day, if it sticks around that long.
Try it out. Let me know what you think and how you changed it to your liking.
My recipes are merely guidelines. I change stuff all the time depending on what's in season and/or on sale, and to my taste. I like more heat than my mom, so I add cayenne. You can too. Try it as is, then change it up :D
Have fun with it. Yum Yum.
Friday, August 3, 2012
Little Homestead in the City - the Urban Homestead Journal
Little Homestead in the City - the Urban Homestead Journal
This really is a great website, full of killer info. This family is amazing. They grow 99% of their own produce, which comes to about 6,000 lbs of food year round, including animals for eggs and manure. They have workshops and lectures as well. They share their stories of their day to day living and homesteading. On a 1/10th of an acre urban lot, they have created a little paradise in the city. It truly is mind blowing and inspiring.
This really is a great website, full of killer info. This family is amazing. They grow 99% of their own produce, which comes to about 6,000 lbs of food year round, including animals for eggs and manure. They have workshops and lectures as well. They share their stories of their day to day living and homesteading. On a 1/10th of an acre urban lot, they have created a little paradise in the city. It truly is mind blowing and inspiring.
Sunday, July 29, 2012
The Jaded Vegetarian: Rose Petal Jelly
The Jaded Vegetarian: Rose Petal Jelly
Excerpt:
Excerpt:
This was a fun recipe to make and the byproduct (the jelly) possesses both beauty and subtle flavor that will no doubt entice me to continue working toward the perfect jar of rose petal jelly.
Letter to my Readers... Reviews
I'm sure you've noticed that I've posted a couple of reviews and I hope you've found them informative.
It's not just me, or you. It's a community. There are some really awesome people doing really awesome things and I want to share them with you, my readers.
I don't have all the answers. I just write down in here what I do, many times, AS I'm doing it. My personal knowledge of things is limited, but I'm always learning. I want to point you in directions of other knowledgeable people so you can get the most and the best information. If I don't have it, I'll direct you to someone who does.
I make the reviews because these are people, products, blogs, I like, I trust and believe in. These are places I learn from. Keeping it all to myself is silly and pointless. As I learn to live better by needing to be frugal and sufficient, I want you to have the same learning opportunities as I do, the same information so that YOU, my readers can make informed decisions, and test the information for yourself, then make judgments on finding what works best for you and your families. I say it often... Learn, Understand, Research, Test & Decide.
If you have any links, videos, blogs and other whatnot you'd like me to check out, comment below! I look forward to learning where you all go to learn.
Be Well,
Niki
YouTube Channel Review: RickVanMan
I don't do this often, but I'm thinking I might. There are so many brilliant people on YT that it may require a thought...
RickVanMan's channel on YouTube (http://www.youtube.com/user/rickvanman) This guy is awesome. I really like his style. He's easy to understand, easy to follow and VERY informative.
His channel is varietal, however he focuses on a lot of the homesteading things that we do. He has instructional and informative videos ranging from herbalism, how to make tinctures, and creams and other useful things with your herbs, foraging, and even gardening. He has many other things on there too. I find him very entertaining and chock full of information. He also answers questions in his comments sections, and is very knowledgeable!
Here is just one his videos about How to Make a Cream.. This is part of a series about herbalism basics.
Do you have other YT channels you enjoy and would like me to check out? Put it in the comments section!
Tuesday, July 24, 2012
Website Recommendation: Homesteading and Survivalism Store
I have recently come across a website called "Homesteading and Survivalism Store." This place is chock full of information, links, products and friendly people!
There is even a CD-ROM of 24 FULL books, over 4500 pages. Many of the books on this are from the late 1800's through the 1950's. Lots of great information that has been generally lost as an art form about canning, and preserving foods for long term storage. I'm going to order the CD-ROM in a few weeks, so that I can well, HAVE and review it for you. I love canning and pickling my own foods.
But anyway, check out the site, let me know what you think. If you already have this CD-ROM, let me know what you think about it?
- Homesteading and Survivalism Store - http://homesteadingsurvivalism.myshopify.com/
- Homesteading and Survivalism Store :: Canning, Preserving, Dehydrating Food CD-ROM - http://homesteadingsurvivalism.myshopify.com/products/canning-preserving-pickling-and-dehydrating-food
Wednesday, July 11, 2012
Recipe: Taco Pie
It's like a taco, a casserole and a lasagna had an orgy!

Ingredients


Ingredients
- 1 lb ground meat or Veggie Substitute (Works great with x-tra firm tofu)
- 1 pkg taco seasoning
- 1 pkg of shredded cheese. (I used sargentto taco blend)
- 4 oz whole milk ricotta
- 6 whole wheat tortillas
Instructions
- Brown meat thoroughly.
- Add taco seasoning to meat. Mix to combine.
- Cut 6 tortillas in half.
- Layer the cut sides of 4 of the tortilla halves against the walls of a 9" x 9" square pan, overlapping them to make the base.
- Spread some ricotta on the tortilla.
- Sprinkle a little cheese.
- Put 1/3 of the meat.
- Layer 4 more tortilla halves, ricotta, meat and cheese.
- Repeat step 8 one more time, holding back some shredded cheese for the top.
- Sprinkle a layer of cheese on the very top.
- Put into a 350*F oven for 15-20 minutes or until the top cheese is bubbly and the casserole is heated through.
- Cut, serve, enjoy!

Sunday, June 3, 2012
Rockin' Recipes: Salsa Chicken in Springroll Cups

My 2 thighs were small. This made 9 pieces.
Ingredients:- 2 left over roasted chicken thighs, skin removed, and pulled from bone.
- 3 Tbsp of your favorite salsa
- 1/2 a Medium Onion
- 4 slices of REAL American cheese, or cheddar (Not pasturized processed cheese food. REAL CHEESE PEOPLE)
- Egg Roll wrappers
- Pinch of salt
- Oil for muffin tin.
Instructions:
- Preheat the oven to 350 degrees Fahrenheit.
- In a food processor, put the chicken, salt, salsa and onion. Buzz until your desired consistency. I went for almost pate style with just a little chunk.
- Oil the muffin tin.
- Line each cup with a wanton wrapper, add filling, til ALMOST full, fold over sides allowing them to overlap each other. Do this for each cup that you have filling for.
- Since the chicken is cooked, we're just browning the wantons, and heating the insides. So bake for about 20 minutes or until golden brown and delicious.
I've also filled wantons with banana and nutella for dessert. OMG To Die For! You can do these same cups with all sorts of fillings; sweet or savory. Fill it with your favorite things, throw it in the oven for something extra special.
Another option is use a mini muffin tin, use wanton wrappers to make appetizers for parties without breaking the bank!
Friday, June 1, 2012
Letter to my Readers #3
So I was washing up the dishes after making the laundry powder and homemade bagels. Yes, I'll post my bagel recipe at some point.
Anyway, so after shaving the ivory, i put the grater into a full sink of hot water that had dishes soaking. My Dishwasher is stupid. I have to wash the dishes by hand before I put them into the dish"Washer" which I use as a high temp rinse and for sanitizing, i guess. Otherwise its a big lump of useless crap...
Anyway 2.0, Ivory on grater, in hot water in sink, it melts into the water. i decided to add a little borax and baking soda to it, and let me tell ya. I was able to soak the dishes for less time. Food came off, including my baking sheets with baked on oil and such on it. Took almost all of it right off. It was great!
The moral of the story... Try a little of that laundry mix in the dish washing instead of just plain dish soap. Let me know how it works for you.
Thursday, May 31, 2012
Replace It: Laundry Detergent: Powder
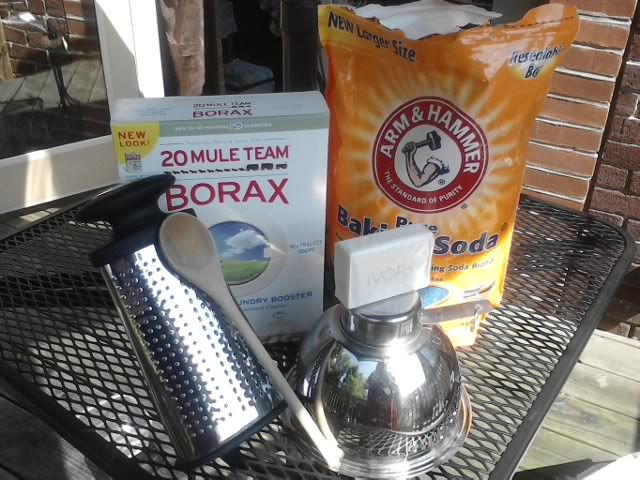
What you'll need:
- 1 bar of plain Ivory or Castile soap (Don't get all fancy with this, moisturizes and scents won't help you wash your clothes. Plain old basic soap is all you need)
- 1 Cup of Borax
- 1 Cup of Baking Soda
- Optional: 1 Tbsp finely ground herbs or 10 - 12 drops of essential oils (experiment with amounts in this. It's for fragrance. a little goes a long way, but make it the way you're happy with it.)
- A container large enough to hold it
- A cheese grater
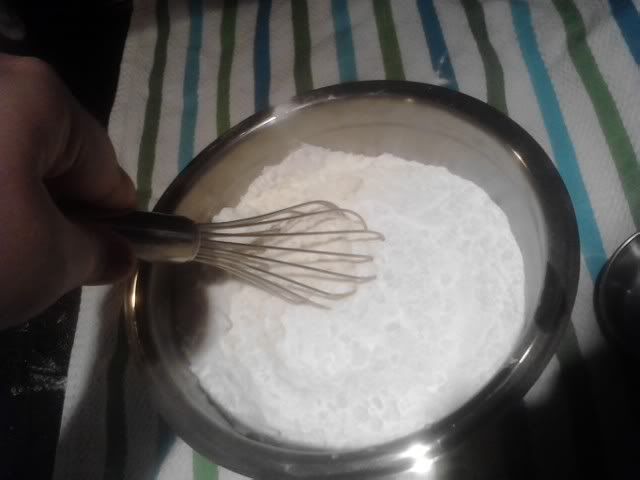
- A whisk or spoon
Instructions: (WITH PICTURES!!!)
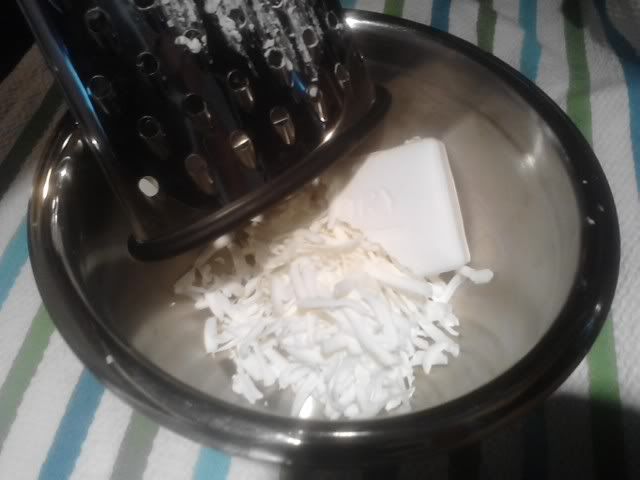 |
| 1. Grate the soap. |
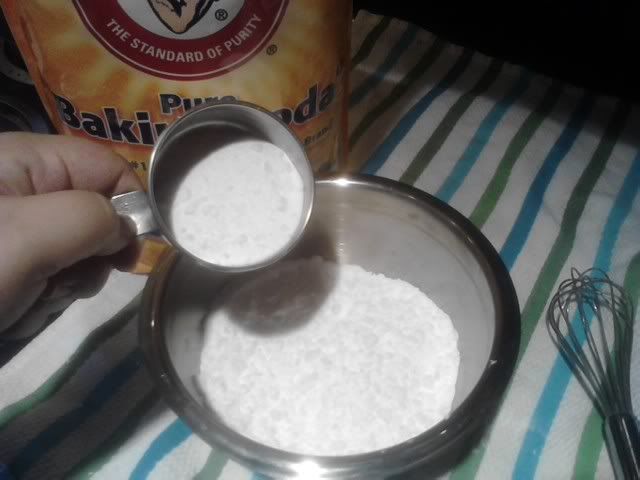 |
| 2. Add Baking Soda |
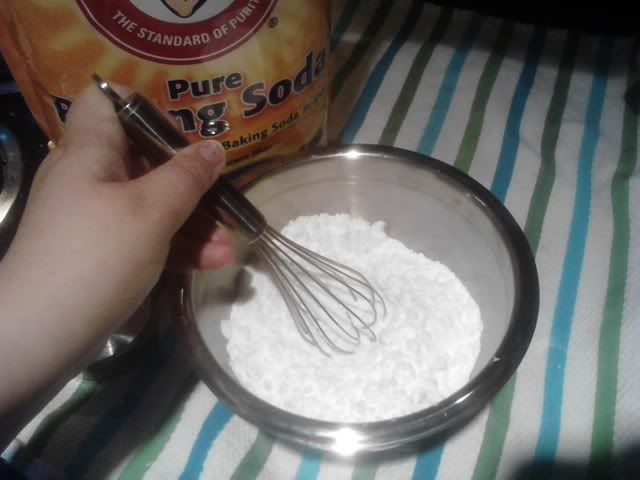 |
| 3. Stir |
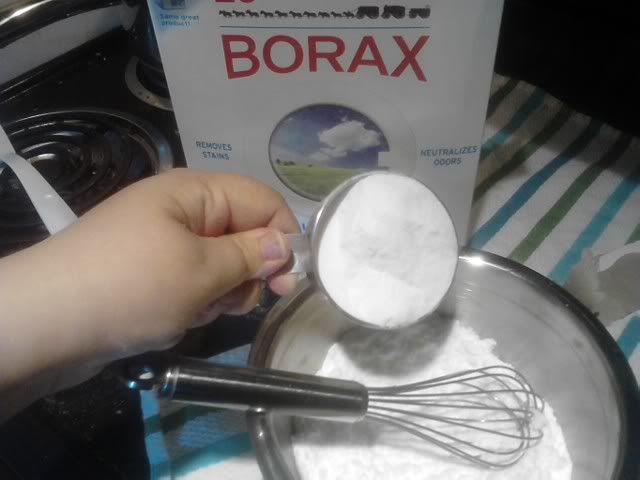 |
| 4. Add Borax |
 |
| 5. Stir |
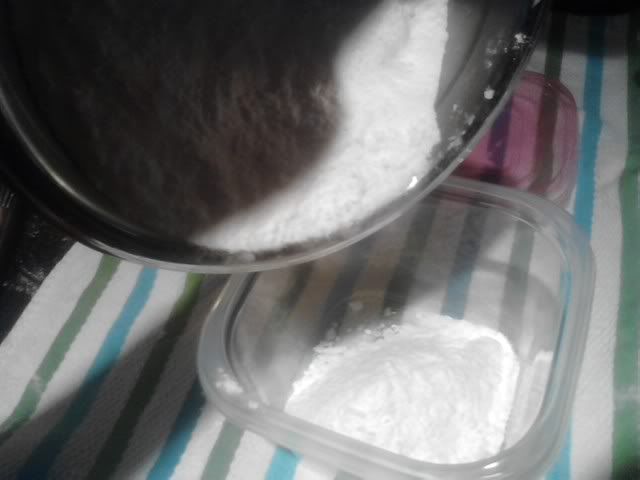 |
| 6. Add to storage container. |
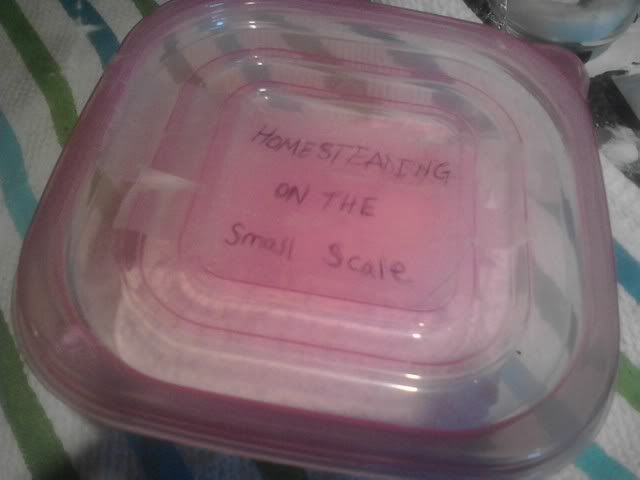 |
| 7. Seal and Label! |
Use:
1-2 Tbsp per regular load. Use more or less depending on how soiled your clothes are and the size of the load.
It will make approximately 32 -64 loads depending on the amount you use, but it's so inexpensive, you can easily make more when you want it!
Oh, you wanted liquid detergent? No problem...
Have you tried this? Know other laundry soap recipes? Tell us about it!!
Subscribe to:
Posts (Atom)